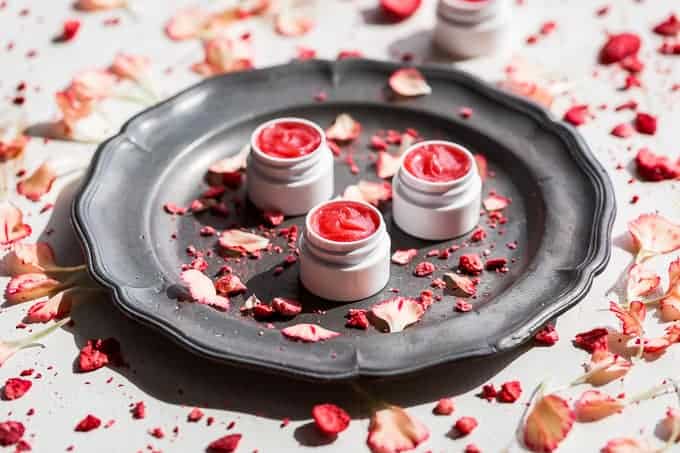
Beyond Store-Bought: Crafting Your Own Strawberry Vanilla Lip Balm
Tired of commercial lip balms laden with unpronounceable ingredients? Imagine a lip balm that not only deeply nourishes but also tantalizes your senses with the sweet, comforting aroma of strawberry and vanilla, all while being completely natural and made by your own hands. Creating your own homemade natural strawberry vanilla lip balm is an incredibly rewarding experience, offering control over what goes onto your lips, customization, and a delightful journey into natural self-care. This comprehensive guide will walk you through everything you need to know to whip up your very own batch of luscious, wholesome lip balm.The Allure of DIY: Why Make Your Own Lip Balm?
In an age where transparency and natural living are highly valued, the DIY movement has gained immense popularity, especially in personal care. Making your own lip balm is more than just a hobby; it's a conscious choice for healthier, more personalized self-care. The primary benefit lies in the absolute control you have over the ingredients. Store-bought balms often contain synthetic fragrances, petroleum by-products, parabens, phthalates, and artificial colorants that can sometimes irritate sensitive skin or offer only superficial hydration. When you craft your own homemade natural strawberry vanilla lip balm, you eliminate these concerns. You can hand-pick nourishing components like organic butters, cold-pressed oils, and pure beeswax, ensuring your lips receive only the best nature has to offer. This not only guarantees a safer product but also allows for deep, lasting moisturization that synthetic alternatives often fail to provide. Beyond health benefits, DIY lip balm is incredibly cost-effective in the long run. Buying ingredients in bulk usually amounts to significant savings compared to continually purchasing individual tubes. Plus, the sheer joy of creating something beautiful and beneficial with your own hands is an unparalleled satisfaction. It's also an eco-friendly choice, as you can reuse containers and minimize waste. For a deeper dive into embracing this natural approach, explore our article on Vanilla & Strawberry: The DIY Approach to Nourishing Natural Lip Balm.Gathering Your Arsenal: Essential Ingredients for Strawberry Vanilla Lip Balm
The magic of a truly nourishing lip balm lies in its core ingredients. To create your perfect homemade natural strawberry vanilla lip balm, you'll need a combination of waxes, butters, liquid oils, and, of course, your signature flavors.1. Waxes (for structure and protection):
- Beeswax: The traditional choice, beeswax provides excellent structure, firmness, and a protective barrier for your lips. It's a natural humectant, drawing moisture to the skin. Look for cosmetic-grade beeswax pellets for easy melting.
- Candelilla Wax (Vegan Alternative): If you prefer a plant-based option, candelilla wax offers similar hardening properties, though you might need slightly less than beeswax to achieve the same firmness.
2. Butters (for deep nourishment and creaminess):
- Shea Butter: Renowned for its healing and moisturizing properties, shea butter is rich in vitamins A, E, and F. It's incredibly soothing for chapped lips.
- Cocoa Butter: With its distinct chocolatey aroma (which complements vanilla beautifully!), cocoa butter creates a thick, protective barrier and is excellent for soothing dry skin.
- Mango Butter: Lighter than shea and cocoa butters, mango butter is packed with antioxidants and helps to soften and moisturize lips without feeling greasy.
3. Liquid Oils (for hydration and spreadability):
- Coconut Oil: A staple in natural beauty, coconut oil is deeply moisturizing and has a lovely light texture. It's solid at room temperature but melts easily.
- Sweet Almond Oil: A fantastic all-rounder, almond oil is rich in vitamins E and K, making it wonderfully nourishing and gentle for sensitive lips.
- Jojoba Oil: Technically a liquid wax, jojoba oil closely mimics the skin's natural sebum, making it highly absorbable and excellent for balancing moisture.
- Castor Oil: Adds a beautiful gloss and helps to seal in moisture, giving your balm a slightly thicker consistency.
4. Flavor & Scent (the strawberry vanilla magic):
- Strawberry Flavoring Oil: This is key. For lip balms, you *must* use an oil-soluble, food-grade flavoring oil. Water-based extracts will separate and cause your balm to spoil. Look for natural strawberry flavoring oils designed for lip products.
- Vanilla:
- Vanilla Oleoresin: A thick, rich extract from vanilla beans that provides a deep, authentic vanilla scent. Use sparingly.
- Vanilla Essential Oil: Ensure it's therapeutic grade and properly diluted.
- Vanilla Bean Infused Oil: For a more subtle, natural vanilla note, you can infuse a carrier oil (like jojoba or almond) with a split vanilla bean for several weeks.
5. Optional Additives:
- Vitamin E Oil: A powerful antioxidant, vitamin E helps to preserve the oils in your balm, extending its shelf life, and also offers additional healing benefits for your lips.
- Cosmetic Mica Powder: For a subtle pink tint, add a tiny pinch of cosmetic-grade pink mica powder.
The Crafting Process: Step-by-Step Guide to Your Homemade Balm
Creating your homemade natural strawberry vanilla lip balm is a delightful process that requires a little precision and patience. Always start with a clean workspace and sanitized equipment.Equipment You'll Need:
- A double boiler setup (a heat-safe bowl over a pot of simmering water)
- Heat-resistant measuring cups or jars
- Stirring utensils (glass rod or spoon)
- Lip balm tubes or small tins
- Droppers or pipettes (for precise pouring)
Basic Recipe Ratio (for a starting point, adjust for desired consistency):
A good general ratio for a firm, yet spreadable balm is approximately 4 parts oil, 2 parts butter, 1 part wax. For example, for a small batch:- 2 tablespoons liquid oil (e.g., sweet almond, jojoba, or a mix)
- 1 tablespoon solid butter (e.g., shea, cocoa, or a mix)
- 1/2 tablespoon beeswax pellets (or slightly less candelilla wax)
- 2-5 drops natural strawberry flavoring oil (to taste)
- 1-3 drops vanilla oleoresin or vanilla essential oil (to taste)
- 2-3 drops Vitamin E oil (optional)
Step-by-Step Instructions:
- Prepare Your Workspace: Sanitize all your equipment (tins, tubes, stirring tools, measuring cups) with rubbing alcohol and let them air dry completely. This is crucial for extending your balm's shelf life.
- Melt Waxes and Butters: Combine your beeswax (or candelilla wax) and solid butters (shea, cocoa, mango) in the heat-safe bowl of your double boiler. Gently heat over simmering water, stirring occasionally until fully melted and clear. Avoid direct high heat, as it can degrade the beneficial properties of the ingredients.
- Add Liquid Oils: Once the waxes and butters are completely liquid, carefully stir in your liquid oils (coconut, almond, jojoba, castor). Continue to stir until everything is well combined and liquid.
- Remove from Heat: Carefully remove the bowl from the double boiler. It's important to add the flavorings and optional additives *after* removing from the heat to prevent their delicate compounds from evaporating or degrading.
- Add Flavorings & Additives: Stir in your chosen natural strawberry flavoring oil, vanilla (oleoresin or essential oil), and Vitamin E oil. If adding mica powder for tint, add a tiny pinch now and stir until evenly distributed. Taste-test a tiny drop on a spoon (after it cools for a second) to adjust flavor intensity if desired. Act quickly, as the mixture will start to solidify.
- Pour into Containers: Working swiftly, use a dropper or pipette to carefully fill your lip balm tubes or tins. Fill them almost to the top, as the balm will slightly contract as it cools.
- Cool and Set: Allow the balms to cool undisturbed at room temperature for at least 30 minutes, or ideally, an hour or two. For faster setting, you can place them in the refrigerator, but let them set at room temperature for a bit first to prevent "sweating" or uneven cooling.
- Cap and Label: Once completely firm, cap your lip balms and label them with the date and ingredients.
Customization & Care: Tips for Personalizing and Storing Your Creation
One of the most exciting aspects of making your own homemade natural strawberry vanilla lip balm is the ability to customize it to your exact preferences.Personalizing Your Balm:
- Adjusting Consistency: If your balm is too hard, melt it down and add a little more liquid oil or butter. If it's too soft, melt it and add a bit more wax. Make small adjustments (e.g., 1/4 teaspoon at a time) and re-test.
- Adding a Tint: Beyond mica powder, a tiny pinch of beetroot powder can offer a subtle reddish tint, or you can use a small amount of an oil-soluble natural red colorant.
- Flavor Intensity: The amount of flavoring oil is entirely up to your personal preference. Start with a conservative amount and add more if you desire a stronger scent or taste.
- Additional Benefits: Consider adding a drop or two of calendula oil for extra healing properties or rosehip oil for its regenerative benefits.
Proper Storage and Shelf Life:
Natural lip balms, free from synthetic preservatives, typically have a shelf life of 6-12 months, largely dependent on the freshness of your oils and butters, and how cleanly you prepared your batch.- Airtight Containers: Always store your lip balm in airtight tubes or tins to prevent exposure to air, which can cause oxidation and reduce shelf life.
- Cool, Dark Place: Keep your balms away from direct sunlight and heat, as this can melt them and degrade the quality of the ingredients. A cool, dark cupboard is ideal.
- Watch for Changes: If you notice any changes in scent (rancid smell), color, or texture, it's best to discard the balm.
